Week 3 of Introduction to Systematic Program Design was definitely a LOT more video content than I was used to from before, and I can safely say that having started watching the videos from Week 4 already, it’s only going to get crazier from here on out!
That said, as always, here are the links to the starting posts from this series, in case you missed out on them:
Intro to “Introduction to Systematic Programming” Course
Introduction to Systematic Programming – Week 1
Introduction to Systematic Programming – Week 2
So Week 3 of class focused primarily on learning How to Design Data and I’ll walk you through each lesson we learned step by step as best I can. Interestingly, I’ve also found that writing up these summaries assists with my own learning as well, so I hope that reading them does something similar for those of you who are my classmates!
Lesson 1: cond Expressions
It’s made clear to the class in this lesson that the designing of data is a point of leverage in designing programs. This is because when we each design the data, we are making, knowingly or unknowingly, decisions about how all of the functions that later operate on that data will operate.
Conditional expressions, or cond expressions, allow us to program conditional behavior when there are two or more cases. This allows cond expressions to be considered “multi-armed conditionals.”
Standard cond expression template:
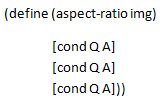
To form a cond QA expression:

Where expression 1 is the Question and Expression 2 is the answer.
Using cond expression template to make a cond example:

The rules to evaluate conds are:
- No Question/Answer pair? Signal an error.
- If the first Question is not a value, evaluate it, replace it with its value. Replace entire cond with new cond in which the first Question is replaced by its value.
- If the first Question is a Boolean that evaluates to true, or is a statement that evaluates to else, replace the entire cond with the first answer.
- If the first Question is false, drop the first Question /Answer pair and replace it with a new cond that does not have the first Question /Answer pair.
- Since 1st Question is not true or false, signal an error.
Additional Notes from this Lesson:
[] are visual conventions – Dr. Racket processes ()s and []s in the same way, but using []s allows us to not get overwhelmed.
Lesson 2: Data Definitions
First and foremost in this lesson, it’s explained that a data definition is a design element. In any program, there is a problem domain as well as data. It’s the realm of the data to take the information that is housed within the problem domain and represent it with data. Essentially, Data Definitions describe how we represent information as data in our program. When I was watching this lesson’s video, it really reminded me of a color key that I would create in excel – taking a symbol, or color, and defining what it means to the user, or in this case, the computer, so it can interpret what the designer (me) meant.
Here’s an example of a Dr. Racket Data Definition:

Lesson 3: Atomic Non-Distinct Data Definitions
This lesson provided a direct example of how data definitions work in practice, using the premise of designing a data definition to represent the name of a city.
Points to Remember:
- The parts of a Data Definition are in the Recipe list
- There are different kinds of Data Definitions
- Atomic means that you can’t take it apart and have it still retain any meaning in the spectrum of the problem information.
Example of a Data Definition for Atomic Non-Distinct:
;; CityName is String
;; interp the name of a city
(define CN1 “Boston”)
(define CN2 “Vancouver”)
Data Driven Templates were covered next in the lesson, and for this same example, we would continue as follows:

Lesson 4: HtDF with Data Definition
The purpose of this lesson was to teach us how to design a function that consumes non-primitive data.
From this lesson, there were really just a few quick tips that I gleaned and I’d like to share with you:
- In the case of Boolean expressions, predicates should end in a ?
- When you design with the Data Definition, use your examples as your guidelines.
- When a function has two cases, flesh out your template by wrapping an if statement around the template
- (Most importantly!!!) Don’t forget to comment out your stub when you start your code!
Lesson 5: HtDF X Structure of Data Orthogonality
First of all, when I saw the title of this lesson I had no idea what it was going to be about – I pride myself on a pretty decent English vocabulary, but orthogonality was a completely new term to me. For those of you who are in the same boat, let me explain: Orthogonal simply means “mostly independent”. In this case it is important because the HtDF method is structured with the assumption that the data types it is working with are orthogonal, so as we learn more types of data we can implement them in our previously written functions without error. I haven’t tested this theory, mind you, but that’s what I understand it to be based on the lessons provided here!
The rest of this lesson was based around explaining this Data Type Chart, which I think is actually pretty neat:

This chart basically walks through all the different data types and prepares us for the upcoming lessons that talk about Interval, Enumeration and Itemization.
Lesson 6: Interval Data Definitions
Interval Data Definitions are used when the numbers to be represented are within a certain range. Key to appropriately representing this are the nuances of inclusivity and exclusivity. For example:
[1, 7] is inclusive, meaning that the numbers included in the interval are 1, 2, 3, 4, 5, 6, 7.
[1, 7), however, is exclusive, meaning that the numbers included in this interval are 1, 2, 3, 4, 5, 6.
As opposed to with cond expressions, in the case of interval data definitions, [] and () produce different results.
Additionally, when using interval data definitions, it’s important to utilize the following two rules:
- Use the Data Chart to find the most appropriate recipe. GO FOR THE MOST SPECIFIC.
- Use the Data Definitions Templates Page to find the template!
Lesson 7: Enumeration Data Definitions
Enumerations are used when crafting a function/program that has domain information for a fixed number of two or more distinct values. In a more real world example, because I prefer those, think of the difference between tracking grades as letter values or as percentages. Letter values are much easier to represent in that there are less and they are exactly defined. However, percentages are inexact and thus cannot be defined with enumerations.
The main points to keep in mind when working with enumerations are that enumerations use the “one of” phrase in their data definition, and these items indented within the “one of” section are known as subclasses. Additionally, examples become completely redundant in enumerations, because the example would literally repeat the definition itself.
Lesson 8: Itemization Data Definitions
Itemization data definitions are utilized when categories with different states, with varying values and types are needed for a function/program. There must be 2 or more subclasses, at least one of which is NOT a single, distinct value.
It’s super important to note that when you are working with mixed data itemizations to guard the subclasses appropriately so that your function is able to run. This is necessary because a subclass that’s a Boolean cannot be evaluated in the same way that a Natural would be, so if you do not tell the program to check what kind of data it’s looking at, it can become confused and your program will break down. To do this, you set up a “guard”. If you’re guarding for a Number, for example, you would put the following before your actual evaluation expression: (number? c).
This is used in Dr. Racket the same way a compiler in a more advanced language would just naturally go in and check the data type. However, in Dr. Racket, we have to do this manually.
Lesson 9: HtDF with Intervals
Testing when using Interval Data Definitions is a bit more complicated than how we’ve previously been taught to write check-expects in the course so far. In the case of Intervals, making sure to test both of the Interval’s boundaries, as well as a midpoint, is the most important lesson disseminated in this section.
Lesson 10: HtDF with Enumeration
As far as testing with Enumerations, the key here is to test at least as many check-expects as you have subclasses. If you don’t, you’re not covering all of your possibilities!
Also noted in this lesson is that you don’t need separate data definitions for separate functions, if they reside in the same program. You can reuse your data definitions!
Lesson 11: HtDF with Itemization
In the case of Itemization testing, unfortunately you have to do a bit more thinking in order to cover your bases. It’s integral to test all of your points of variance in itemizations, as well as checking any boundaries of adjoining definitions, to make sure that their behavior is as you would expect. It’s much better for you to test thoroughly and include any corner-cases that you can think of, as opposed to finishing your program, sending it to users, and then having to retroactively fix something they found that you were “too busy” to test for!
Lesson 12: Structure of Information Flow

Identifying the structure of your information is a key step in your program design, because, as we said at the start of this week’s notes, the choices you make in how you craft your data will ultimately impact the options you have when crafting the code of your entire function/program.
Wrapping Up Week 3
So in the class forums, a lot of people said this week was when class “got real.” Frankly, I disagree. I think that week 3 in a lot of MOOCs is when there’s a pretty steep dropoff because what’s being presented goes from generalist knowledge and becomes slightly more in depth. However, again as I mentioned, I started watching the videos from Week 4 and I can say with confidence that Week 4 is where it’s going to “get real.” Interactive Programs? That’s something I can get excited about.
Stay tuned for next week and you can see if I’m still hanging in with class! There’s double the video content and I’m preeeeeetty sure the homework is going to be intense!
Questions/Comments?
Feel free to comment here on my blog, or find me on Twitter @DokiDara.


